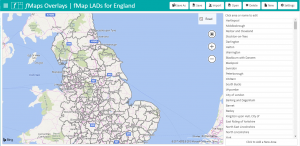
The fMaps Overlays Tool lets you create and manage map overlays showing area borders. These can be used as backgrounds to maps, or to select points by area, or as the data for Areas type maps.
The map shows the areas in the overlay. with all areas list to the right. Click on an area (in the map or the list) to open a dialogue to edit the area’s details.
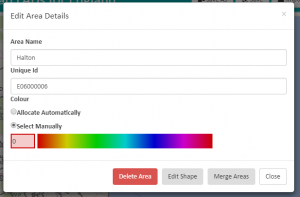
 Edit the name of the area and optionally add a unique id. This is used to connect the area to a map point (e.g. it’s centre or administrative centre).
You can apply a colour to each area in the overlay, or leave the default of allowing fMaps to allocate one automatically. This option is ignore in Areas maps where the colour is allocated based on factor values.
Areas may dragged and dropped in the list to change the order.
Click “Edit Shape” to enter the edit mode on the map. The shape may then be edited. Use the Bing Maps edit features to change the shape. Click “Stop Drawing” above the areas list when complete.
Click “Merge Areas” to select two or more areas to merge as one area. fMaps can use multiple shapes as a single area Use this option to bring together different areas for example when an area comprises islands or you want to bring together several post code areas into a single region. Click “Complete Merge” when you have selected all areas to merge. Note this may take some time with complex maps.
Import
The import option may be used to create a new overlay from data gathered using a DSD (with a purpose of Overlays). Typically the data is from a geo-spatial SQL query and should contain WKT format shape data. Please contact Fibonacci for assistance.


