Special Tags are located in the second tag box towards the bottom of the tag panel. These are available wherever you are in your document and support a variety of uses, such as conditions, charts, and other functions:
Conditions and Compares
It’s common to have sections of your document that you only want to show when certain conditions apply, eg an area of text which only applies to adults and should be removed/hidden if the subject is under 18.
fDocs Designer allows you to specify conditions to show only information relevant to the data. These conditions are performed when the document is generated.
There are a few ways in which you can apply conditions to your document.
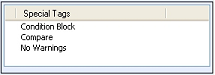 a) The fDocs administrator can create conditions in fDocs Admin (on the DSD) and these will show in the Special Tags section. In this example the special tag is No Warnings which was created in fDocs Admin. The document content placed within these tags, which can include text and any other tags, will be shown ONLY IF the condition specified is true. Or;
b) You can specify a single condition by using the Compare tag.
c) You can also specify multiple conditions by using the Condition Block with the Compare tag:
Using the Compare Tag
This allows you to specify which two values to compare in some way, similar to an “IF” statement. This may be:
- Comparing a field with a fixed value, ie a number (Age=18)
- Comparing two fields (ClientPostCode=RelativesPostCode)
- Whether a data group has records (Warnings number of records)>0
To do this, insert the compare tag into your document. A wizard dialogue box will open:
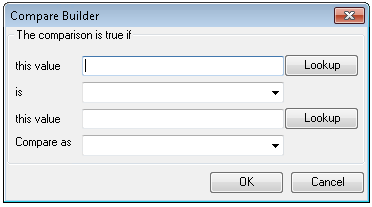
| this value | The first value to compare can be a field from your tag list or free-text entry. |
| is | The operator to make the calculation. Use the drop-down box for options. |
| this value | The second value to compare against. Can also be a field from your tag list or a free-text entry |
| Mode | You can specify on what basis the comparison is done, whether it is text, numerical, true/false, or a date comparison. For example, as numbers 2 is less than 12, but as text “2” comes after “12”. |
The object/text which is displayed if the condition is TRUE must be surrounded by the condition tag. You can create the object/text then select it and double click on the Condition tab. Or, insert the condition tag and type inside it.

Condition Block
A condition block allows you to group 2 or more comparisons together to add a condition upon which a section of the document may or may not show depending on which condition is true. For example, a client letter contains 3 different telephone numbers but you only want one to show, depending on the department of the user who is generating the file. You can achieve this by placing the compare and condition tags into a block.
To do this:
- Insert the “Condition Block” tag into your document
- Place the condition and compare tags inside it. If you want to show a piece of text or data if none of the conditions are met, place the “else” tag within the “fDocs_conditions” section
- Place the data you want to show inside the else. In this case, either the first condition to evaluate to true or the contents of the “else” tag will be shown – everything else will be ignored.
You can also place condition blocks inside other blocks, to build “if this, then if this” type conditions.
Image Tag
Add this tag to the template to insert a stored image(s), that will dynamically update (just like data tags) as opposed to a static single image. For example, the data source contains a field which holds a reference to the location of images of products on each product record and the template needs to generate the product image for each product contained in the output.
Use a “dummy” image, in the template as a placeholder. The size of the placeholder image will set the maximum height and width for the generated image The Image tag should be placed around this placeholder.
How to use an Image Tag:
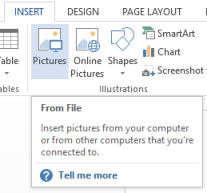 From the Word Insert Ribbon select Pictures and browse/select any image file. Do not copy/paste the image as this will fail to generate an image.
- Resize the inserted image as desired, remembering that whatever the dimensions these will be the maximum that the generated image will be (although it will retains its natural proportions).
- Select the image, including some line spaces above and below the image and double click on the Image tag (in Special Tags) so that is surrounds the image.

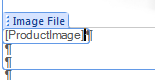 The full path to the image’s file, relative to the fSeries server, must be specified using a combination of the Image Path and Image File tags inside the Image tag. The entire location may be placed in the Image File tag, but the Image Path tag is provided as an option in order that you can, for example, have the fixed images location in the Image Path tag (as a typed in path, or a function tag to build the path specification) and the actual location in the Image File tag (specified as a data tag from a data group). During generation, the image will be found and embedded into the Word document.
Remove Empty
A tag can be applied to remove all contents of a section of the template, if there is no data or text within it. Simply surround the section required with the “remove_empty” tag and all values within it will be checked, ignoring spaces and other “white space” characters. If no valid text is found the entire section is removed. This is useful to remove blank address lines.
Function Tag
Refine the output of the data by applying a function to a data tag. For example:
- Change the case format from upper case to lower case and vice versa.
- Insert a future date by adding a calculation to a date field.
This is covered in more detail in the Functions documentation.

