Introduction
This document provides a step-by-step guide; concepts and principles are not explained here so you should use this guide in conjunction with our product documents.
Say you want to output multiple copies of the same document/letter but each one personalised for different people. For example; a letter inviting all the members of the child’s team to a meeting.
The 3 main tasks for achieving this are:
1 A data set definition (DSD) identifying the people, the child and the meeting details.
2 An fDocs Designer template tagged up and set-up in a way which will repeat the letter for each recipient.
3 A method for entering variable text which in not stored in the MIS.
1 Defining the DSD
1.1 Identify What You Need
The best method would be to scope out what you want and create an SQL query or View based on your needs. For example:
| Team Members | Child | Case Details |
| Title | Client Id | allocated social worker |
| First Name | First Name and Surname | Organisation Address |
| Surname | Address | Organisation contact details |
| Address | Date of Birth |
NB. If there is variable information that is not stored on your database but will need to be added to the document, such as the date of the letter, Our Ref etc then these will be handled outside of the DSD and explained in the next section of this document.
1.2 Creating the DSD
1.2.1 Create a new fDocs DSD with your data group(s).
You could either do just one single data group or, if you want to be able to see easily manage the composition of the DSD you could break the query into 3 data groups, ie Team Member, Child and Case Details. Both ways will work, but it’s a case of how you want to manage it.
1.2.2 The data group
All the fields that you want repeating for each recipient must be in the same data group (or nested data groups by using the “parent” feature). Make sure that you do not have Design As Top Level checked under the fDocs tab, as this will remove the data group tag ie (dg_members) which is vital for the next steps.
1.2.3 Creating User Entries
You will need User Entries to specify variable values such as ClientId. You can also use User Entries to generate user input text which could be different each time the mail merge is run, and where the information is not stored in your database, e.g:
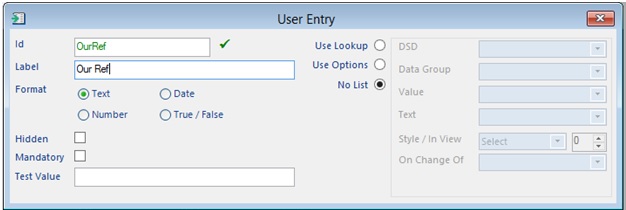
|
Above: sample User Entry defined in the DSD for Our Ref |
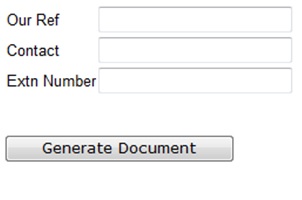
|
Above: example of what the user will be presented with when they run the mail merge. |
2 Creating the Template
2.1 How to tag it.
Essentially it is the usual process but with one major consideration when it comes to ensuring that the document is repeated for each person you want as a recipient. Here is the process:
- Apply the DSD (remember to change over from TVAssess if necessary)
- Apply the data group tag around the content which is to be repeated for each recipient: e.g:
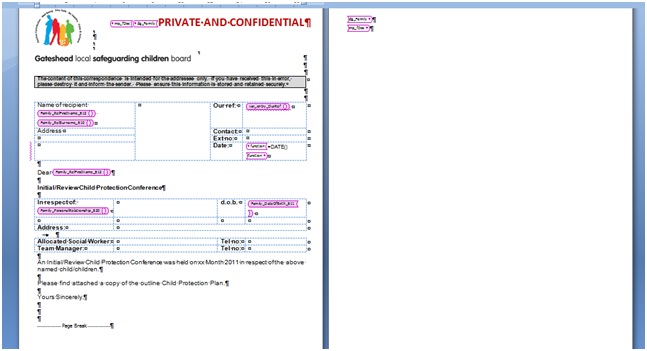
The sample above shows the following (note that “Show Markers” from the fDocs Designer ribbon has been highlighted to show field markings in the above screenshot):
- Opening tag at the beginning: the dg_member data group tag.
- Next is all the content you want to repeat for each recipient and the field tags.
- After the content is a page break – this ensures that the next letter starts on a new page
- The final item, on the second page, is the closing tag for dg_member.
2.2 The Preview
When you preview your template you will be asked to fill out your variable additional data, ie Our Ref. The document will generate a copy for every recipient in your data group. If there are no people in your data group ie the child does not have any members in their team, then the preview document will be completely blank.

