TV Assess is an fDocs application that allows users of OLM Systems CareFirst* to produce high quality, highly customised outputs based on assessment data held in the CareFirst database.
As all data comes from within CareFirst and is based on queries specified by the server administrator, no DSD needs to be created in order for templates to be created.
Here’s how to use fDocs Designer to create TV Assess templates:
1 Switch the Designer to TV Assess Application mode
Open the Designer and click Settings. Once you have connected and logged in an option appears called “Application”. Change this to TV Assess. Your setting is retained so that the next time you open Word, fDocs will remain in TV Assess mode. Therefore, when you have finished working with assessments and wish to switch fDocs back to “General” useage, change the setting back accordingly.
2 Work on a template.
To start a new template hit the “Apply DSD” button to apply the TV Assess DSD to your document.

The Start Date is important – the tags that appear will only relate to questions that were valid on the day you select. You can have many copies of a template for one assessment type, based on various start dates. Therefore you can retrospectively create a template for an assessment that already exists within CareFirst.You will be asked to select the Application Code of the assessment you are creating a template for, and select a Start Date for the template.
When a user selects an assessment for printing, TV Assess automatically finds the most relevant template (the version that immediately preceeds the assessment being selected), and uses it as the template for the output. For example, if templates have been created with start dates of:
- 1st January
- 1st March
- 1st August
Then when a user selects an assessment dated in September, the August template will be used. However if the user selects an assessment from February, the January template will be used.
Once you have selected your assessment application code and start date the designer will load the tag list, containing:
- Tags about the subject (client)
- Tags relating to the Assessment Header
- Tags relating to the Assessment Questions – this is the actual question text entered into CareFirst
- Tags relating to the Assessment Answers – these are the answers given
- (Optional) Other fields that an administrator has offered relating to the client or assessment but do not usually appear as part of an assessment record, such as GP / Team / Plan information.
Tag up your template as normal (see the fDocs Designer user guide for assistance if required), using the tag list filter to filter the tag list to only show client, header, questions or answer tags as required.
You can save your template locally and open it again later to continue work on.
To preview your template, use the Preview button and select an appropriate set of data to show. You will then see a preview of how the assessment output will look for the end user.
3 Upload your Template
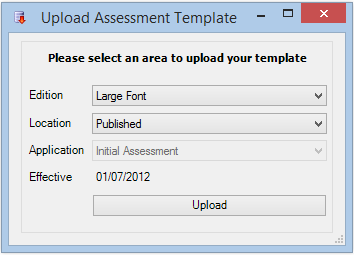
Once your template has been completed and you are happy with it, click “Upload” to upload your template to the server. You will be asked whether you wish to put it in a Test (holding) area, or to publish it, enabling it to be used by end users.
You may also select an edition (if enabled by a system administrator). This allows you to have multiple versions of the same assessment styled for, and aimed at for example, a child, adult, or court. This feature may also be used to produce a large-print edition of an assessment output.
Once your assessment has been uploaded and published, end users can produce an output for their assessment using your template, provided the date of the assessment is after the Start Date you selected for your template. End users will be able to tell which assessments can be printed as the list of assessments on offer will change from grey text, to a black hyperlink.
Downloading Templates
If you need to work on the template again at a later date, you may use the Download Template option to download the template from the server. If you need to delete a template at any time, right-click on the name of it once selected in the drop-down list and click “Delete”.
* The developers and suppliers of Total View and fSeries have no commercial association with OLM Systems.

